Have you ever filmed indoors and found everyone looks orange, or shot outdoors in the shade and found faces turned blue? The camera did not see the colour of the light the way your eyes did. Setting white balance tells the camera what “white” should look like under the light you are using, so skin tones and colours look natural.
This guide explains colour temperature in simple terms, the white balance options on most cameras and phones, how to set a custom white balance with a white or grey card, what to do under mixed lighting and an illustrative settings sheet for common situations.
What is white balance?
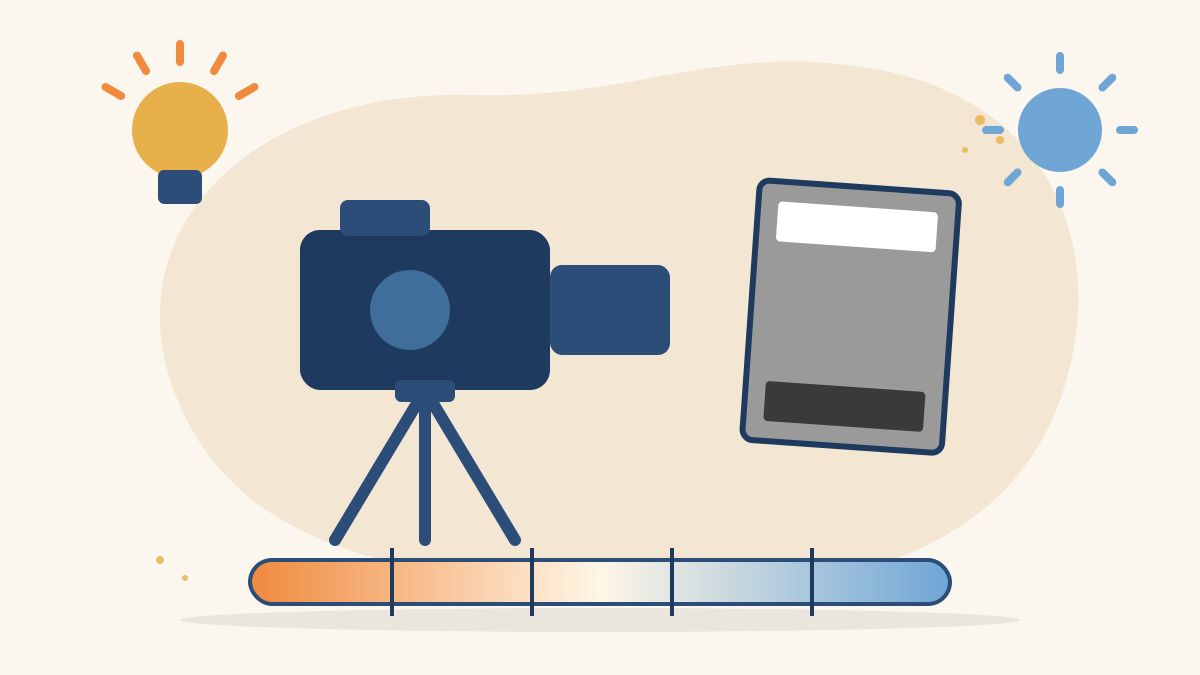
Every light source has a colour. Candlelight and household bulbs are warm (orange), midday sun is close to neutral, and open shade under a blue sky is cool (blue). Our brains adjust automatically, so a white sheet of paper looks white to us in all of these places. Cameras need to be told.
White balance is the camera setting that corrects for the colour of the light. When it is set correctly, white objects look white and everything else falls into place.
Colour temperature and the Kelvin scale
Light colour is measured in kelvin (K). Lower numbers are warmer, higher numbers are cooler. Canon’s guide to white balance gives approximate values for its presets:
- Tungsten (household and film tungsten lamps): around 3,200K
- Fluorescent: around 4,000K, though tubes vary a lot
- Daylight (direct sun): around 5,200K
- Cloudy: around 6,000K
- Shade: around 7,000K
Many video lights are marked “daylight balanced” (often 5,600K) or “tungsten balanced” (3,200K), and many LED panels let you choose a value in between.
One point confuses beginners: the number you dial in is the light you are correcting for. Setting 3,200K under tungsten bulbs makes the image neutral. Setting 3,200K outdoors in sunlight makes everything look blue.
White balance options on most cameras
Auto white balance (AWB)
The camera guesses. It works reasonably in simple light, but Canon notes it can be fooled when one colour dominates the scene or there is no real white to measure. In video, the bigger problem is that auto can shift during a shot, for example when someone in a red kurta walks into frame, causing a visible colour change.
Presets
Daylight, cloudy, shade, tungsten and fluorescent presets are quick and consistent. They are a good choice when you know your light source.
Kelvin
Lets you dial in an exact number. It is the most precise option when you know the colour temperature of your lights.
Custom (preset manual) white balance
You point the camera at a white or neutral grey card under your actual light, and the camera measures it. This is the most accurate method under unusual or mixed lighting.
On phones
Many phone camera apps have a “pro” or manual video mode with a white balance or “WB” control. If yours does not, a third-party app with manual controls may offer it. At minimum, lock exposure and focus, and avoid moving between very different light sources in one shot.
How to set a custom white balance
Menus differ, so check your camera’s manual. The general steps are:
- Set up your lights first. White balance must be measured under the final lighting.
- Place a white or grey card where your subject will be, facing the camera and lit by the same light.
- Fill most of the frame with the card, and make sure it is correctly exposed, not blown out.
- Select custom white balance in the menu and take or register the reading.
- Check the result on a known reference, such as the subject’s skin and a white shirt.
- Re-measure whenever the light changes, for example when you move from a window to a room lit by bulbs.
If you do not have a card, a plain white sheet of paper works in a pinch, though some papers have a slight blue tint.
Mixed lighting: the most common problem
Indian homes and offices often mix daylight from windows with warm bulbs or cool tube lights. The camera can only be balanced for one colour, so the other will look wrong. Options:
- Remove one source. Switch off room lights and use window light, or close curtains and use your own lights.
- Match your lights to the dominant source. Set an adjustable LED to match the window, or to match the room bulbs.
- Gel the lights. Coloured filters can convert a light’s colour, though this takes practice.
- Balance for faces. If you cannot fix the room, set white balance for the light falling on the subject’s face.
Our guide to video lighting for beginners shows how to plan a simple three-light setup.
Illustrative example: a settings sheet for a day of shooting
This example is illustrative. A two-person team films a short documentary about a women’s tailoring cooperative.
- 9 am, outdoor courtyard, direct sun: Daylight preset or about 5,200 to 5,600K. Check skin tones on the monitor.
- 11 am, interview inside, one daylight LED plus window: custom white balance from a grey card at the subject’s position.
- 2 pm, workshop with tube lights only: custom white balance; fluorescent tubes vary, so do not trust the preset.
- 5 pm, rooftop at golden hour: Daylight preset, so the warm evening light stays warm on purpose.
- 7 pm, home scene with warm bulbs: about 3,200K, or custom white balance if the bulbs look green-tinted.
Notice the 5 pm choice. White balance is not only about accuracy; it is also a creative decision. Keeping a fixed daylight setting at sunset preserves the golden mood.
White balance and editing
Small corrections are possible in editing, and our guide to colour grading for beginners explains the basics. But footage recorded in compressed formats on most phones and entry-level cameras has limited room for correction, and strong fixes can make skin look grey or noisy. Getting it right in camera saves time and protects quality.
Common mistakes to avoid
- Leaving auto on for interviews, causing colour shifts mid-answer.
- Changing settings between cameras in a multi-camera shoot. Set every camera to the same Kelvin value or the same custom reading.
- Measuring before the lights are on.
- Forgetting to reset after moving locations.
White balance works hand in hand with exposure, so pair this guide with our article on how to shoot in manual mode.
Learn camera and filmmaking skills with Karuna Media
Karuna Media, an initiative of Puppets Picture Education Trust (PPET) in Noida, trains women from underprivileged backgrounds in media, filmmaking and AI skills through the Karuna Media Master Program, so they can build portfolios for creative careers.
- Want to learn? Read about the program and apply here.
- Want to help more women work behind the camera? Support our work through the donate page.
Your next step
Film the same white sheet of paper and your own face in three places: by a sunny window, under a room bulb and in shade outdoors. Record each once on auto, once on a preset and once with custom white balance. Compare all nine clips side by side and note which method gave the most natural skin tone.
The Giving Movement by Karuna Media · #TheGivingMovement
Wear the cause: tees, a tote and a mug that fund media training for women
Tee (Black) ₹699 · Tee (White) ₹649 · Tote ₹449 · Mug ₹399. Printed on demand and shipped across India. 100% of the profit funds media training for underprivileged women.
Buy now on Razorpay Prefer to donate? Go to our donate pageMerch is a purchase, not a donation, and is not eligible for 80G. To make a donation, use our donate page.